Tucker Designs
  • Home
  • My Portfolio
    • Kitchens | Dining
    • Living Rooms
    • Bedrooms
    • Bathrooms
    • Laundry | Pantry
    • Outdoor Spaces
    • Before & After
  • SHOP BY STYLE
  • Real Estate
  • BHG PRODUCTS
  • Artwork
  • Blog
  • About
    • About Me
    • Connect
  • Design Services
  • Design Quiz
  • Client Portal
Search by typing & pressing enter

YOUR CART

1/21/2022 1 Comment

DIY Photo Wall

Are you looking for an easy way to display your family photos? I have an easy and inexpensive solution for you! You can make this project in a weekend. The good news - you can easily change the photos as your family "grows".
Picture
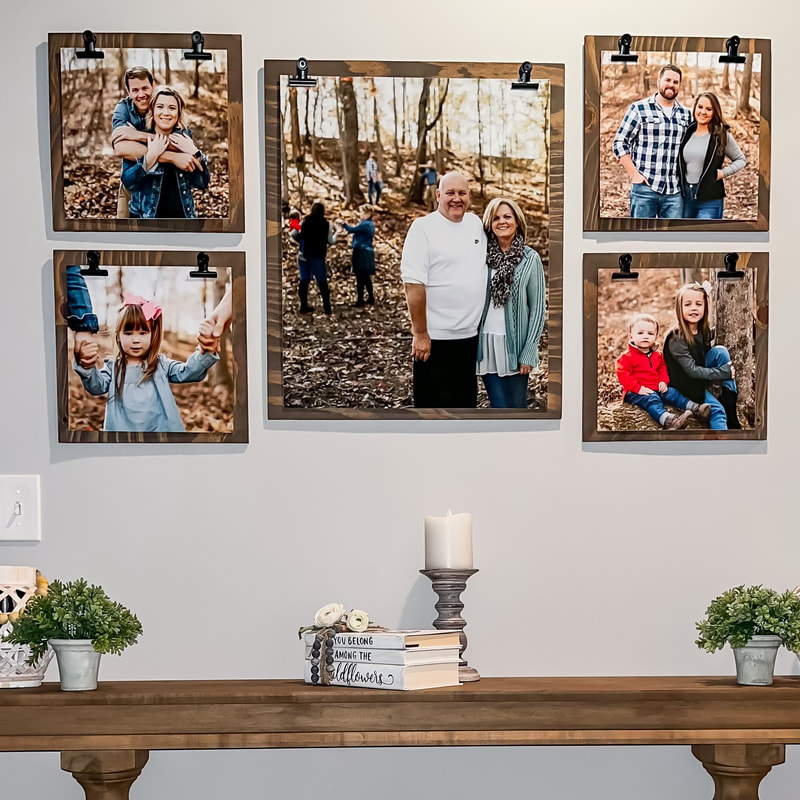
This page may contain affiliate links which means I may receive a commission for purchases made through links. Learn more on my Private Policy page.
 List of materials:
  • 1/4" plywood (the least expensive works well)
  • 220 grit sandpaper
  • Stain (I used dark walnut) see below
  • bulldog clips​
  • sawtooth hangers
  • Your favorite photos printed on single weight mat board
Tools needed:
  • Table saw (if you don't have one, have Lowes, Home Depot, or your hardware store cut the plywood for you. Be sure to have your sizes ready.)
  • Rags for the stain
  • Screwdriver 
​Start by selecting the photos you want to display and the layout. Try to pick colors and subjects that compliment each other. You could also print them in black and white. The sizes I chose were (1) 20"x24" and (4) 12"x12". You can order prints with this link: single-weight mat board
Picture
Next have your boards cut 2" wider and 2" longer than your photo sizes. Sand them really well with sandpaper. Wipe the dust off and then stain them. After they have dried, screw your bulldog clips to the top of each board, evenly spaced. Then attach sawtooth hangers to the back.
Now you are ready to attach your photos with the bulldog clips and hang them on the wall. Stand back and enjoy!
Below is a video of the entire process.
- till next time
Picture
Picture
Pinterest
1 Comment
Brockton Sex link
10/31/2024 01:15:45 pm

I enjoyed reading your poost

Reply


Leave a Reply.

    Author

    Debbie Tucker, CID

    Archives

    July 2024
    September 2022
    May 2022
    January 2022
    December 2021
    November 2021
    October 2021
    September 2021

    RSS Feed

    Categories

    All Design Tips DIY Exteriors Resources

    Affiliate 
    I may include affiliate links in which I might earn a small commission at no extra cost to you. 
    Disclosure Statement

Home

Blog

Services

Connect

TUCKER DESIGNS