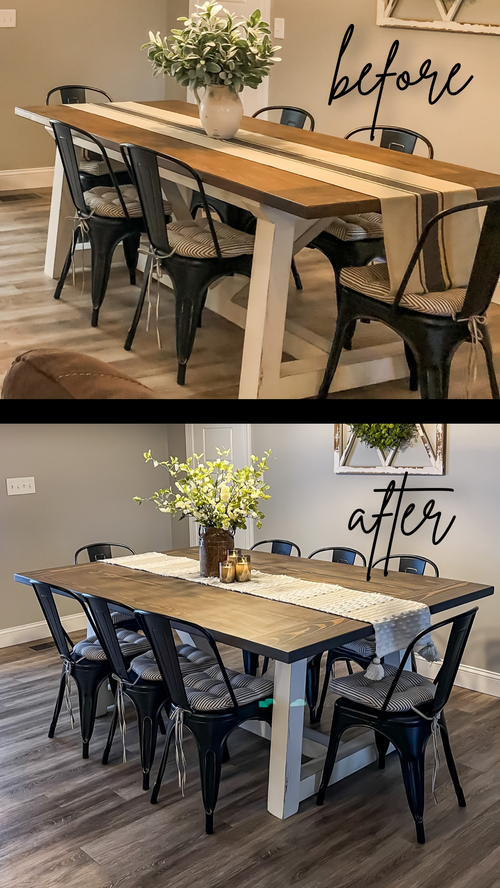
 My brother built this table for me about 2 years ago. I recently decided to make it wider to accommodate more seating. I removed the tabletop from the base and took it to their woodshop - Cobb Brothers Woodworking, and then the process began. There is a video of the whole process at the bottom of this post. 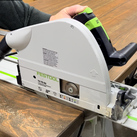 I wanted to add about 16" to the width of the table. So, Dwayne brought out the circular saw and went to work cutting up that beautiful tabletop to make room for the new boards. He cut off each end and then split it length wise. 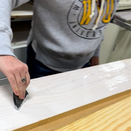 Since we no longer had any of the thick pine boards that we originally used, we had to glue up the pine he had in his stockpile. We used kiln dried yellow pine and planed it down to the right thickness. We then glued them up and waited for them to dry. 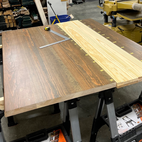 The next step was to plane the boards again to ensure they were completely flat and the same thickness. We then placed the new boards between the old ones and marked where the dominos would go and went to work creating the holes with a Festools Domino Joiner. 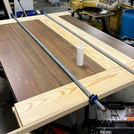 After that it was a matter of lining up the dominos, gluing, and clamping all the new boards together. After the glue had dried he trimmed off the excess with the circular saw and used the router to put a nice finished edge around the entire table. 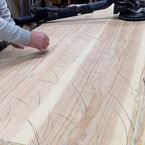 Now it's time to sand, sand, sand, and then sand some more. Just when I thought it was done, Dwayne took a pencil and scribbled all over the top. This way when the markings are gone, you know you have a good smooth finish. This is NOT my thing, I am not patient and you need to have patience in order to do a good job. 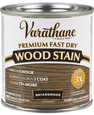 Once the sanding was complete, I wiped the table down with a tack-cloth and applied a coat of stain. I used Briarsmoke by Varathane, it has a nice gray-brown tone. After that was dry we sprayed it with a coat of clear vinyl. I then applied a coat of wax and it was ready to reunite with the base! 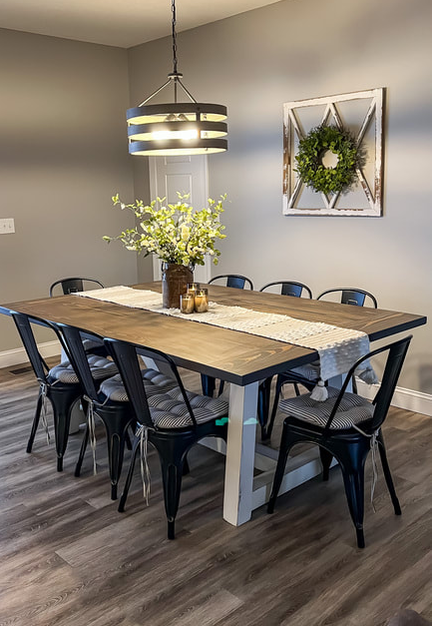 I am so so pleased with how it turned out. A HUGE thank you to my brothers, Dwayne & Rick who made it happen. If you live in or near West Virginia and are looking for custom cabinetry or furniture, look no more - they are the best!! Just message me and I will give you their contact info. Here is that video I told you about! Don't hesitate to message me with any questions. - till next time  
0 Comments
Leave a Reply. |
AuthorDebbie Tucker, CID Categories
All
Affiliate
I may include affiliate links in which I might earn a small commission at no extra cost to you. Disclosure Statement |
 RSS Feed